Why Roof Flashing Matters for Leak Prevention
Flashing is an essential component of a roof, ensuring watertight protection around chimneys, vents, skylights, walls, and other roof junctions. Proper flashing installation protects your home against water infiltration and structural damage. Whether you are dealing with visible cracks or worn-out flashing, knowing when and how to replace it can prevent costly repairs down the road.
If your flashing has active leaks that need to be stopped before you can complete a full replacement, understanding how to repair roof flashing leaks step by step can help you address the water infiltration in the meantime.
Follow these 5 steps to replace roof flashing properly and help protect your home from water infiltration.
Step 1: Gather Materials and Tools for Roof Flashing Replacement
Roof Flashing Materials You Need
To successfully install flashing, it is crucial to have the right materials on hand:
- New flashing: Choose flashing that is compatible with your roof type, material, and the area being repaired.
- Galvanized roofing nails: Use rust-resistant nails to ensure a durable hold.
- High-quality roofing cement: Roofing cement helps seal exposed edges and reduce the risk of water infiltration.
Tools Needed to Replace Roof Flashing
The essential tools for replacing flashing are:
- Hammer: For securely nailing the flashing in place.
- Utility knife or tin snips: Used to cut the flashing to the required size, depending on the material.
- Pliers: Useful for handling, bending, and adjusting the flashing.
- Wire brush: Useful for removing debris, old sealant, and loose material before installation.
Step 2: Remove Old Flashing and Prepare the Roof Surface
Before installing the new flashing, thorough preparation of the work area is essential:
- Remove the old flashing: Use a hammer and pliers to carefully remove the old flashing without damaging the roofing. This must be done with care to avoid affecting the underlying structure.
- Clean the work area: Once the old flashing is removed, clean the surface with a wire brush. Remove all debris, dirt, and residue from the old flashing. A clean, dry surface is essential to ensure maximum adhesion of the new flashing and proper water resistance.
Step 3: Measure and Cut the New Roof Flashing
To ensure correct installation of the flashing, accurate measuring and cutting are essential:
- Measure the required length: Use a measuring tape to determine the exact length of flashing needed. Measure precisely to avoid errors that could compromise the watertight seal of the roof.
- Cut the flashing accordingly: Cut the flashing according to the measurements using the appropriate tool for the material, such as tin snips for metal flashing. Make clean, straight cuts for a proper fit.
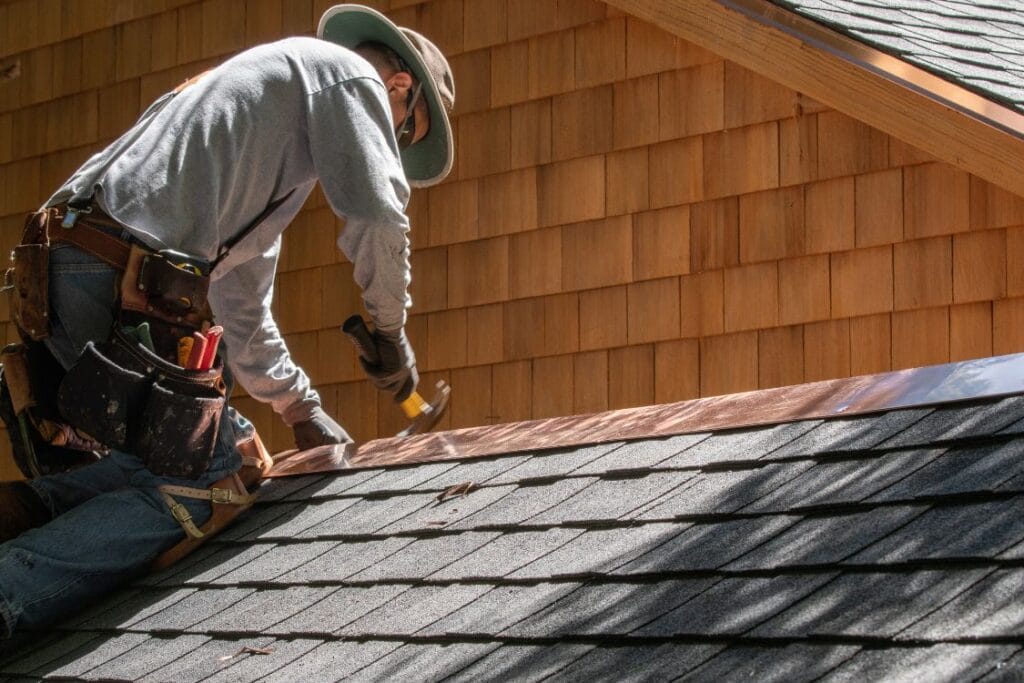
Step 4: Position, Fasten, and Seal the Roof Flashing
The next step is to correctly position and secure the flashing:
- Position the flashing: Place the cut flashing in the designated location on the roof, making sure it is properly aligned with the edges of the roofing and around openings such as chimneys and vents.
- Fasten with roofing nails: Use galvanized roofing nails to firmly secure the flashing in place. Make sure the nails are driven in evenly for a stable hold.
- Apply roofing cement: To seal the edges of the flashing, apply roofing cement according to the manufacturer’s instructions. This helps prevent water from getting under the flashing and supports a watertight seal.
If the installation seems complex or the leak source is unclear, it is best to consult a professional roofer. Proper flashing contributes greatly to the protection of your roof and the longevity of your roof covering.
Our team offers comprehensive roof repair and maintenance services for situations where flashing replacement is part of a broader repair project or where professional installation is the safest and most reliable path forward.
Step 5: Check the Roof Flashing for Leaks
Once the flashing is installed, it is crucial to complete the finishing work and conduct thorough checks to confirm the flashing is properly sealed.
- Check for leaks: Carefully examine the flashing and surrounding areas to make sure there are no leaks. If conditions are safe, a controlled water test can help identify remaining leaks around the flashing and surrounding shingles.
- Confirm the flashing is properly fastened and sealed: Verify that all nails are fully driven in and that the roofing cement is correctly applied. A secure fastening is essential to prevent water infiltration and structural damage.
How to Keep Roof Flashing Watertight Over Time
Here is a summary of the key steps for replacing flashing:
- Gather the necessary materials and tools.
- Prepare the work area by removing the old flashing and cleaning the surface.
- Measure and cut the flashing to the appropriate size.
- Position and fasten the flashing using roofing nails and roofing cement.
- Complete the finishing work and verify the watertight seal.
If repeated flashing problems are pointing to broader deterioration across your roof, it is worth reviewing the signs that indicate it may be time for a full roof replacement before investing further in localized repairs.
It is important to regularly check the condition of your flashing to prevent leaks around chimneys, vents, skylights, walls, and other roof junctions, and to protect your shingles and other roofing materials. If you need assistance, do not hesitate to contact professional roofers or contractors for a quote and personalized advice. Regular maintenance of your flashing contributes to the durability and safety of your home.
Frequently Asked Questions About Roof Flashing Replacement
How do I repair damaged roof flashing?
To repair damaged flashing, clean the affected area, apply a roofing-grade sealant or flashing cement compatible with your roofing material, and press the edges back into place firmly. If the damage is extensive, it may be necessary to replace the damaged section entirely rather than attempting a patch repair.
How do I install roof flashing?
To install roof flashing, measure and cut the material to the required length, position it correctly along the junction point, fasten it with galvanized roofing nails, and seal the edges with roofing cement to ensure a complete watertight seal.
How do I install chimney flashing?
Chimney flashing usually requires base flashing, step flashing, and sometimes counter flashing installed in overlapping layers to direct water away from the chimney. Because this area is highly leak-prone, professional installation is often recommended.
How long does roof flashing last?
Roof flashing typically lasts 20 to 30 years when properly installed and maintained. The lifespan depends on the material used. Aluminum and galvanized steel are the most common options and offer good durability. Lead and copper flashing can last 50 years or more. Regular inspections help catch early signs of corrosion, loosening, or sealant failure before leaks develop.
What materials are used for roof flashing?
The most common materials for roof flashing are aluminum, galvanized steel, copper, and lead. Aluminum is lightweight, rust-resistant, and easy to work with, making it a common option for residential roofing. Copper is more expensive but extremely durable and aesthetically appealing. Lead is flexible and long-lasting but less common due to environmental concerns.