For most homeowners, a complete roof replacement is one of the most significant renovation investments they will ever make. The process involves far more than simply removing old shingles and nailing down new ones. In Gatineau and the greater Outaouais region, the local climate places particularly demanding requirements on roofing materials and installation quality. Winters are long and harsh, summers are hot and stormy, and every freeze-thaw cycle puts tremendous stress on your home’s exterior envelope.
Understanding exactly what happens during a roof replacement project allows you to plan more confidently, avoid unpleasant surprises, and make smarter decisions at every stage. Whether your home sits in Aylmer, Hull, or the surrounding suburbs, the fundamental process remains consistent regardless of the material you choose. This comprehensive guide walks you through every phase, from the initial inspection to the final cleanup and delivery of your warranty documentation.
Knowing what to anticipate also helps you communicate more effectively with your contractor. When you understand the sequence of work, you can ask better questions, identify warning signs in proposals, and recognize quality workmanship when you see it. Before starting the process, if you are still unsure whether your current roof has truly reached the end of its useful life, reviewing the signs that indicate it is time to replace your roof in the Outaouais can help you confirm that a full replacement is the right course of action.
Key Facts About Roof Replacement in Gatineau
- A complete residential roof replacement follows a precise sequence of steps that every homeowner should understand before the project begins.
- Inspecting the wooden decking after the tear-off phase is a critical step that can reveal hidden damage and affect the final project cost.
- Most standard residential projects in the Gatineau area are completed within one to three working days, depending on surface area and roof complexity.
- A professional roofing contractor handles complete site cleanup before leaving, including a magnetic sweep to collect loose nails from your lawn and driveway.
Roof Inspection and Estimate Before Replacement
Every successful roof replacement starts with a thorough professional assessment. A qualified contractor visits your property to inspect the visible surface, check the attic space for signs of moisture damage, and measure the total area requiring new coverage. This initial evaluation helps identify underlying issues that could affect the final cost, such as rotted decking sections, weakened framing, or an attic ventilation system that needs to be corrected as part of the project.
Following the inspection, you receive a detailed written estimate covering the materials, the labor, the project timeline, and the warranties provided. Getting at least two comparative estimates before committing is always a sound strategy. If you want to understand how roofing costs are determined so you can better evaluate the quotes you receive, learning how to calculate the price of a residential roof helps you identify whether the numbers you are being given are realistic and fair.
What a Roofer Checks Before Replacing Your Roof
A thorough assessment covers the overall condition of your shingles or metal panels, the flashing around chimneys, pipes, and roof vents, the integrity of your gutters and drip edges, the presence or absence of an existing underlayment, and the ventilation balance in your attic space. Each of these factors directly influences the scope of the required work and the realistic project budget. A roof showing advanced deterioration may require additional structural repairs that only become apparent once the old material has been completely removed.
How to Prepare Your Home Before Roof Replacement
Your involvement in the days leading up to the project contributes meaningfully to how smoothly everything proceeds. Clear your driveway and the areas immediately surrounding your house to allow space for a debris container and material deliveries. Move patio furniture, cover any delicate plants growing close to your foundation walls, and let your immediate neighbors know about the upcoming work, particularly if your home is a semi-detached or townhouse unit. Inside, cover valuables stored in your attic, since the vibrations from pneumatic nail guns can shake dust and small particles loose through the framing above.
Roof Tear-Off and Deck Inspection: What Happens First
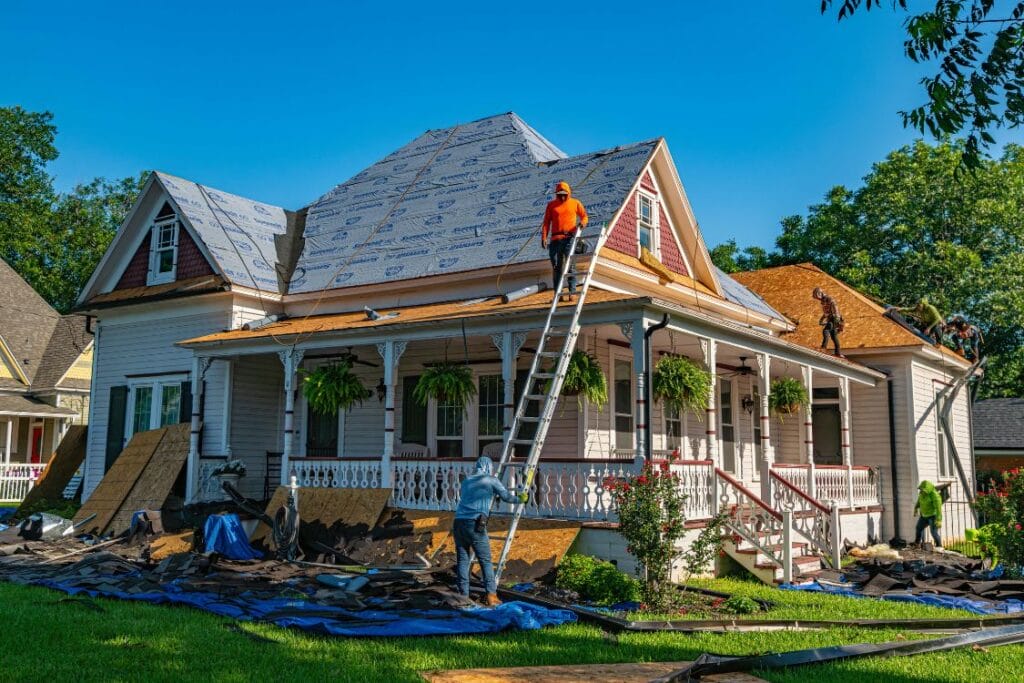
The first day of active construction is typically the most intense phase of the entire project. Before any removal begins, the crew places protective tarps and plywood panels around the perimeter of the house to catch falling debris and shield your landscaping from damage. A roll-off container or a debris trailer is positioned as close to the work area as possible to allow efficient disposal of the stripped materials.
The tear-off proceeds systematically from the highest point of the roof downward, section by section. Specialized tools allow the crew to work quickly without damaging the wooden decking underneath. How fast this phase moves depends on the type of material being removed and the number of layers present. A single layer of standard asphalt shingles comes off considerably faster than an aging metal installation with many fastener points.
Why Roof Deck Inspection Matters Before New Installation
Once the surface is fully stripped, the contractor carefully examines every square foot of the wooden decking. This is where unexpected discoveries can occur. Soft or spongy spots underfoot, dark water staining, and visibly deteriorated sections indicate moisture damage that must be corrected before any new material goes down. These deck repairs add to the original estimate and cannot be confirmed until the old covering is fully removed. A trustworthy contractor will flag these issues immediately, walk you through the affected areas, and provide a revised cost breakdown before proceeding further. Never allow work to continue without being fully informed of any such discoveries.
When the decking is in solid condition throughout, the team moves directly into underlayment installation, keeping the project on track and within the originally quoted budget.
Installing Underlayment, Shingles and Final Roofing Materials
The waterproof underlayment forms the critical protective barrier between your wooden structure and the outside elements. In a northern climate like Gatineau, where freeze-thaw cycles are especially severe, the quality of this layer and the precision of its installation are non-negotiable. The crew applies a synthetic underlayment across the entire prepared deck surface, with particular attention paid to the most vulnerable zones: the lower edges of each slope, all valley intersections, and the areas surrounding the chimney and any roof penetrations.
Ice-and-water shield membrane is applied along the eaves and throughout the valleys as an additional defense against the ice dams that form regularly across the Outaouais region every winter. This self-adhering product seals hermetically around every nail penetration and maintains its integrity even when shingles above it are partially lifted by high winds.
Why Attic Ventilation Matters During Roof Replacement
Proper attic ventilation is frequently overlooked during roof replacement projects, yet it plays a central role in the long-term performance of everything installed above it. Inadequate air movement creates moisture buildup that silently degrades the decking and compresses insulation. Experienced contractors evaluate the balance between soffit intake vents and ridge exhaust vents before the final layer goes down. If the existing ventilation is inadequate, additional vents are incorporated directly into the new installation to meet the necessary airflow requirements.
How Shingles or Metal Roofing Are Installed
Installation of the top layer always begins at the lowest edge of the slope and progresses upward toward the ridge. Each successive row overlaps the previous one by a manufacturer-specified amount, ensuring that all rainfall drains cleanly outward without working its way between layers. The ridge line, hip edges, and all penetration points receive specialized finishing pieces designed to seal the installation completely. Metal flashing details at every chimney base, wall junction, and pipe penetration are critical components of a leak-free result. Maintaining these details over the years is equally important, since damaged flashing is one of the leading causes of indoor water damage and often requires professional attention to properly repair roof flashing leaks before the problem spreads to interior surfaces.
Roof Cleanup and Final Walkthrough After Installation
Completing a professional roof replacement extends well beyond nailing down the last ridge cap. The crew installs ventilated ridge caps, replaces vent covers, and verifies that every penetration through the new surface is properly flashed and sealed. A quality contractor then performs a thorough magnetic sweep of the entire lawn and driveway to collect scattered nails, cleans accumulated debris out of your gutters and downspouts, and removes all waste materials from the site before leaving.
A final walkthrough with you before the crew departs is standard practice for any reputable roofing company. Walk the exterior together to verify the uniformity of the surface, the alignment of the ridge, the condition of all trim pieces and flashing details, and the overall cleanliness of the site. This is also a good time to ask questions about the care and maintenance of your new installation. For ongoing protection after the project is complete, professional roof repairs and maintenance services help keep your investment in top condition between annual inspections.
How Long Does Roof Replacement Take in Gatineau?
Project duration depends primarily on total surface area, roof complexity, and weather conditions on the day of work. A standard detached single-family home with approximately 2,000 square feet of roofing surface can typically be completed in one full working day by an experienced team. Homes with multiple dormers, steep pitches, complex hip configurations, or several chimney penetrations require additional time and more careful detailing throughout.
Weather is always a variable in this region. Contractors do not work on wet or icy surfaces because slippery conditions create serious safety risks and compromise the adhesion of underlayment products. Late spring through early fall offers the most favorable working conditions in Gatineau, and reputable contractors fill their schedules quickly during these months. Scheduling your project several weeks, or even a few months, in advance is recommended, since the best contractors in the area book up quickly during peak season.
Roof Replacement Warranties and Documents to Keep
At the end of the project, a professional contractor delivers a complete documentation package. This typically includes the manufacturer’s material warranty, the contractor’s workmanship warranty, technical product specifications, and maintenance instructions. Premium architectural shingles often carry manufacturer warranties ranging from 25 to 50 years, while workmanship warranties covering installation defects such as premature leaks generally span two to ten years depending on the roofing company.
Keep all of this documentation stored somewhere safe and accessible. It will be essential for any future warranty claim and can serve as a strong selling point if you ever decide to put your property on the market. A recent roof with proper documentation provides real reassurance to prospective buyers and can positively influence your home’s appraised value.
How to Plan a Successful Roof Replacement in Gatineau
A full roof replacement in Gatineau is a major project, but it does not need to be an overwhelming one. Understanding the complete sequence of work from the first inspection through to the final walkthrough puts you in a much stronger position to choose the right contractor, ask the right questions, and recognize quality craftsmanship when you see it. The demanding Outaouais climate makes it especially important to work with professionals who understand the materials and techniques best suited to the region. A properly installed roof will protect your home and your family reliably for decades. The team at Morin Toiture is here to guide you through every step of the process. We invite you to contact us today to schedule a thorough inspection of your property and get your project started.
Frequently Asked Questions About Roof Replacement in Gatineau
Do I need to leave my house during a roof replacement ?
There is no requirement to vacate your home. The entire project takes place outside, and the main inconvenience is the noise from nail guns and hammers. Families with young children or pets sometimes choose to spend the day away for comfort, but it is not a safety necessity.
Can a contractor install new shingles directly over the existing ones to save money ?
While some building codes permit a second layer of shingles under certain conditions, most experienced professionals advise strongly against it. The practice prevents a thorough inspection of the wood decking, adds significant weight to your framing, and shortens the lifespan of the new installation. Complete tear-off is the most reliable method for achieving a lasting and properly sealed result.
How will I know if my wood decking needs to be replaced ?
The full condition of the decking can only be assessed after the old material is removed. Your contractor checks for soft or spongy sections, dark water staining, and signs of rot across the entire surface. Any compromised areas must be replaced before the new underlayment and shingles are installed.
What is the best time of year for a roof replacement in Gatineau ?
Late spring, summer, and early fall offer the most favorable conditions. Warmer temperatures improve material adhesion, and lower precipitation rates reduce the risk of weather-related delays. Scheduling your project well in advance is recommended, since the best contractors in the area book up quickly during peak season.
How long will my new roof last ?
Lifespan varies by material. Standard asphalt shingles typically last 15 to 20 years. Architectural grade shingles can reach 25 to 30 years or more under good conditions. Metal roofing offers the longest performance in the region, often exceeding 40 years with proper care.