



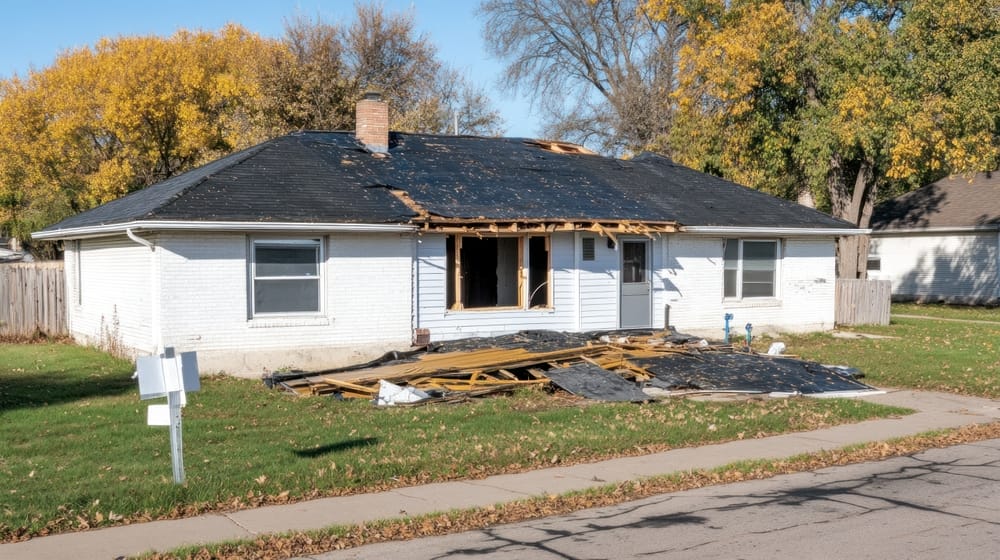
A roof leak rarely announces itself with fanfare. It usually starts as a faint water stain on the ceiling, easy to dismiss as a one-time thing after a particularly heavy rainstorm. By the time a stain appears on the ceiling, water may already have traveled through the insulation, affected the wood framing, and created the warm, damp conditions in which mold can grow. In Canada’s climate, where temperatures swing dramatically between seasons, even a minor infiltration can turn into structural damage within a single winter.
Knowing how to repair a roof leak correctly is one of the more practical things a homeowner can learn, not because every repair is a do-it-yourself job, but because understanding the process helps you make faster, smarter decisions when water gets in. This guide covers how to locate the source of the leak, how to address the most common failure points, and when the damage goes beyond what a temporary fix can handle.
Key Points About Roof Leak Repair
The following points summarize the most important things to understand before starting any repair work on a leaking roof:
- Water stains on a ceiling often do not appear directly below the actual entry point, because water travels along rafters and sheeting before dripping down.
- Flashing failures around chimneys, skylights, pipes, and roof valleys are among the most common causes of leaks on residential roofs.
- Ottawa’s freeze-thaw cycles cause sealants and caulking to crack and pull away from surfaces faster than in milder climates.
- Asphalt shingle repairs, flat membrane patches, and flashing re-sealing all require different materials and techniques.
- Temporary patches can stop short-term water entry, but they do not address the underlying cause.
- A roof that has leaked for more than one season without repair often has secondary damage to the decking and framing underneath.
Finding the Source of a Roof Leak
The most important step in any roof leak repair is accurate diagnosis. Applying sealant or replacing shingles in the wrong area may not stop the leak, allowing water to continue causing hidden damage.
Starting the Search Inside the Attic
If you have attic access, start there. On a bright day, enter the attic and look for daylight coming through the roof deck. Water stains, discoloration, and soft spots in the plywood are also indicators of where moisture is getting in. Run your hand along the underside of the decking boards near the area above the ceiling stain and feel for dampness. In many cases, the wet spot on the decking will be several feet away from where the stain appears on the ceiling below, because water follows the angle of the rafters before finding a low point and dripping.
Mark the location from inside the attic using a piece of tape or chalk, which will help you find the corresponding spot on the exterior.
Inspecting the Exterior
Once you have a general idea of where the water is entering, move to the roof surface. Use a stable ladder and wait for dry, calm weather before getting on any roof. Walk carefully and avoid stepping on areas that feel soft or spongy, as this indicates compromised decking beneath.
Focus your inspection on the following high-risk areas rather than scanning the entire surface:
- Flashing joints where the roof meets a chimney, wall, or skylight.
- Ridge caps and hip shingles along the peak of the roof.
- Any penetration point where pipes, vents, or satellite mounts pass through.
- Low-lying valleys where two roof planes meet and water concentrates.
- Gutters and their connection points to the fascia board.
The Most Common Roof Leak Sources and How to Fix Them
Damaged or Missing Shingles
Asphalt shingles crack, curl, and become brittle with age, particularly after years of Ottawa’s hard winters. When a shingle breaks or blows away, the underlying felt underlayment is exposed. If that layer is also compromised, the wood decking beneath can be reached by rain and snowmelt.
Replacing individual shingles is straightforward on an accessible roof section. Slide a flat pry bar under the damaged shingle and pop the roofing nails loose. Remove the old shingle, slide a replacement into position, and nail it at the specified nailing zone marked on the shingle face. Cover the nail heads with a dab of roofing cement to prevent rust and water intrusion. Press the tabs of the shingle above back down and apply a small amount of sealant under them if they were disturbed during removal.
For larger areas of damaged shingles, or if the shingles are original to a roof that is 20 or more years old, replacing a section without addressing the age of the surrounding material is only a short-term solution.
Failed Flashing
Flashing is the thin metal sheeting installed at all roof penetrations and transitions. It is one of the most common sources of leaks in otherwise sound roofs, because sealants and caulking around flashing joints have a limited lifespan and degrade faster than the shingles around them.
Signs of failed flashing include lifted edges, visible rust, gaps in the sealant line, and cracks at the corners of the flashing bend. In some cases, cleaning the joint thoroughly with a wire brush, removing old cracked caulking, and applying a fresh bead of roofing-grade sealant or butyl tape can resolve the issue. More serious flashing failures, where the metal itself is rusted through or has been installed improperly, require removing the surrounding shingles and replacing the flashing entirely.
Properly installed roof flashing is among the more reliable defenses against chronic leaks. Homeowners who have dealt with recurring leaks around a chimney or skylight often find that the issue was flashing that was never installed correctly in the first place.
Flat Roof Membrane Leaks
Flat roofs and low-slope roofs common on commercial buildings and many residential additions in the Ottawa and Gatineau area use membrane systems rather than shingles. Modified bitumen, EPDM, and TPO membranes can develop blisters, splits, and seam separations over time.
Finding the leak source on a flat roof is more difficult than on a sloped roof because water spreads horizontally under the membrane before finding a path through. If there is pooling water on the surface, start your inspection at the perimeter edges and around any roof penetrations, as these are the points most likely to fail first.
Small membrane tears can be patched using compatible patch material. The repair area must be completely dry, clean, and free of any loose material before the patch is applied. Roll or brush roofing adhesive over the damaged area, press the patch into place, and seal all edges thoroughly. For EPDM membranes, a seam tape and primer system is the standard repair method. Improper patching materials are a common mistake that can lead to early patch failure.
For larger membrane damage or seam failures covering more than a few square feet, a professional assessment is strongly recommended before committing to a repair approach.
Temporary Stabilization While You Plan the Full Repair
If a roof is actively leaking and full repair cannot happen immediately, temporary measures can help limit water entry while you arrange proper work.
Roofing tarp systems are a common temporary solution. A heavy-duty polyethylene tarp secured with boards and rope across the affected section can help keep direct rain out. Avoid using staple guns or nails to secure a tarp directly to shingles, as the additional penetrations can create more entry points and cause more damage.
Roof patch products available at hardware stores, including self-adhesive flashing tape and liquid roof sealant, can seal small cracks, holes, and lifted shingles on an emergency basis. These products work best in dry conditions and on surfaces that have been cleaned and dried. They are not permanent solutions, but used correctly they can buy enough time to schedule a proper repair without the leak continuing to spread.
When Professional Roof Leak Repair Is the Right Choice
Some repairs are within reach of a competent homeowner. Others involve conditions where doing the job improperly creates more damage and more expense than calling a certified roofer from the start.
Seek professional help when the leak source is unclear after a thorough inspection, when the decking beneath the shingles shows signs of rot or delamination, when the leak covers a large area rather than a single identifiable point, or when the roof is steep or difficult to access safely. A certified roofing contractor can use thermal imaging to locate hidden moisture within the roof assembly, which is often the most direct way to find leaks that resist visual detection.
Regular professional inspections and maintenance can help identify problems early. Information on roof repair and maintenance services is available for homeowners who want a scheduled approach to keeping their roof in good condition.
Preventing Future Leaks
Repair work addresses the current problem, while preventive maintenance can reduce the risk of another leak. Clean your gutters at least twice a year, in spring and fall, to prevent water backup that can push under shingles and flashing at the eaves. Trim tree branches that overhang the roof, as both physical abrasion and debris accumulation accelerate shingle wear. After major winter storms, inspect your roof from the ground with binoculars for any obviously displaced shingles or lifted flashing.
Pay close attention to your roof after ice dam events, which are common in Ontario winters. Ice dams form when heat escaping from the house melts snow at the upper sections of the roof, and that meltwater refreezes near the eaves where the surface is colder. The resulting ice forces water back under the shingles and into the house. Improving attic air sealing, insulation, and ventilation, where needed, can help reduce ice-dam formation. Understanding when roof replacement may be appropriate becomes relevant when ice-dam damage is recurring and roofing materials are aging.
If you have flashing that is more than 10 to 15 years old, consider having it inspected and re-sealed even if you are not currently experiencing a leak. Preventive roof flashing replacement often costs less than dealing with the wood damage and mold remediation that follow a prolonged leak.
Conclusion
Roof leak repair is a task that rewards careful diagnosis above all else. Finding the real source of the problem, understanding the materials involved, and applying the correct repair technique for that specific failure type is what separates a lasting fix from a recurring headache. For smaller, clearly identifiable issues on accessible roof sections, a prepared homeowner can often handle the repair directly. For anything involving membrane failures, widespread shingle damage, rot in the decking, or chronic leaks that have resisted previous repair attempts, working with a certified contractor is the more reliable path.
If you are dealing with a roof leak and want a professional assessment before deciding on a course of action, contact the team to schedule an inspection. Catching problems early often helps save money in the long run.
Frequently Asked Questions About Roof Leak Repair
How do I find the exact location of a roof leak?
Start in the attic and look for water stains, daylight through the deck, or damp insulation. Mark the approximate area from inside, then inspect the exterior, focusing on flashing joints, shingle edges, and penetration points like vents and pipes. Remember that the actual entry point is often several feet away from where the ceiling stain appears.
Can I repair a roof leak myself?
Minor repairs such as replacing a few damaged shingles, re-sealing lifted flashing, or patching a small area of flat membrane are within range for a careful homeowner with basic tools. Larger repairs involving structural damage, widespread membrane failure, or difficult roof access are better handled by a certified contractor to ensure the repair is done correctly and safely.
What happens if a roof leak is left untreated?
Water that enters continuously through a roof leak can saturate insulation, cause wood rot in the rafters and decking, promote mold growth, and eventually compromise ceiling drywall and interior finishes. The longer a leak goes unaddressed, the more expensive the repair becomes, because secondary damage to the structure often costs more to fix than the roofing problem itself.
Does homeowners insurance cover roof leak repair?
Coverage depends on the policy terms, the cause of the damage, and any applicable exclusions. Sudden storm damage may be covered under some policies, while leaks attributed to gradual deterioration or deferred maintenance are often excluded. Review your policy carefully and document the damage with photos before beginning emergency repairs.